Showing posts with label ham radio. Show all posts

Sunday, 15 November 2020

RF-Power8000 - Power meter installation on Windows 10

RF-Power8000 Installation

Get the software

I got my RF-Power8000 here from Bangood. Unfortunately they didn't provide a download link for the software and manual. A quick google search at the time (Nov.2020) of writing revealed this source:
  • Software download from passion-radio LINK
  • Instruction manual from passion-radio LINK
RF-Power8000


Install the driver

The RF8000 communicates over a USB-to-serial bridge, that your computer might not immediately find the right driver for. In that case, you'll find a "serial" device marked with a "?" in the device manager.
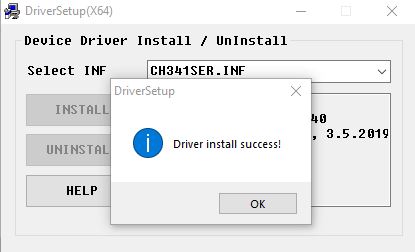
The driver is provided with the software package (see above). As I don't like drivers that come with a setup routine, I recommend to use the "rightclick/update driver" function of the device manager.
Just point it to the "drivers_usb_CH340" folder and windows will find and install the driver.
At that point you should see another serial port in the device manager:

The meter shows up on COM6


Register MSCOMM32.OCX

Depending on other installations on your PC, starting the RF8000 software with the uninventive name of "english.exe" might result in an error message. In that case, MSCOMM32.OCX needs to be registered on your system.
To register the OCX, open an "elevated shell" (right click the start button and choose "Windows Powershell (Administrator)")
There type (with the path pointing to your rg_8000 directory):
 .\regsvr32.exe C:\Users\admin\Desktop\RFPower8000\rf_8000\MSCOMM32.OCX

Your path will be different

Configure the software

The program "english.exe" needs to be configured for both the COM-Port and the Baud Rate. It defaults to COM1 and 4800. While with some luck, your COM-Port might be "1", the baud rate ist not correct. Also: in "Model selection" choose "RF-Power8000"
Here are the correct settings:
  • Model selection RF-Power8000 (F3)
  • Port number: set that to what your device manager shows as Com Port. In my case COM6
  • Baud Rate: 9600
After that, I have to press the center button to start the meter.

No, it ain't pretty :-(

To set the frequency and the attenuator value (you absolutely need an external attenuator!) for the measurement, hit the "spanner and screwdriver" button.

Addendum 20201116:
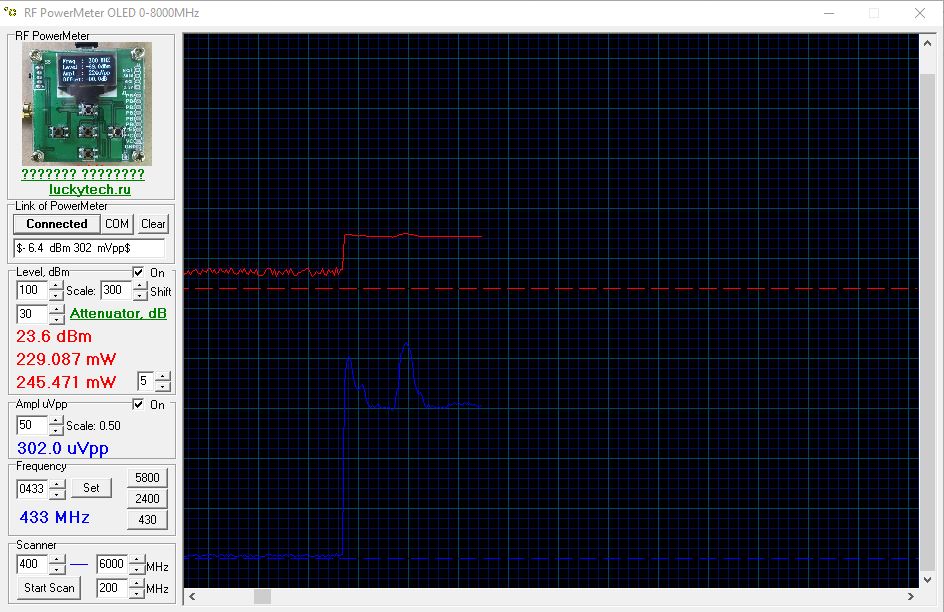
This russian (?) RC enthusiast has written his own software for the RF-Power8000

And it looks good, too:


Thursday, 5 September 2019

UV9RPlus - Programming the water proof Baofeng radio for HAM use

Baofeng UV-9RPlus

Advantages of the UV9R Plus over the UV-5R series

Quick review of the Baofeng UV-9R Plus: I had an UV5R for quite a while now as my primary handheld for HAM radio. There is a lot of documentation about the UV5R out there and I quite like it for it's long battery runtime.
Waterproof connector

But as an outdoor enthusiast, rain, dirt and moisture were a concern. So I went for the UV-9R Plus when Banggood had a promo. It feels quite a bit more rugged than the 5R. The higher output power (the label on the back claims an unlikely 15W) and the 8000mAh battery (well, that has to be seen, I haven't measured the actual capacity) were not really a factor for me. But it is sure nice to have three power levels to choose from.
Banggod has a promo from time to time when it sells for about the same price as the uv5r.


Programming the UV9RPlus with Chirp in Windows 10

The programming cable

The programming cable with its odd connector

I got the programming cable from Banggood:


The cable was a little over 5 bucks at the time of writing. It has a Baofeng label (unlike my UV5R programming cable described here) and has the Prolific USB2Serial bridge chip, which requires a driver, of course. My windows found the driver itself with the "update driver" function of the device manager.
The USB Vendor ID identifies it as a Prolific bridge

Once the driver has installed, it comes up as a serial port

Chirp settings

There has been some controversy in the Chirp forum whether or not the UV9R Plus was supported or not. My finding is, that while it is not explicitly listed as a supported device, it appears to behave like the UV-82WP.
The first thing to do in Chirp is to download the radio's original configuration, and save that, just in case, and then work from that configuration.
Your COM port number will probably be different
The cool thing is that you can copy your channel memories from your UV-5R over to the UV-9R Plus, with a simple copy/paste.
My memory channels
I recommend the following basic settings for HAM radio operations. The other settings are mostly irrelevant.
Basic settings UV9RPlus

Final remarks

Why Baofeng advertises it's otherwise decent product with false specs is most likely a very questionable marketing stunt. A quick web search indicates, that the actual RF output power ist around 7W max, which does not make that much of a difference from the usual 5watters.
Keep in mind that doubling the power adds only one S-level on the receiving side. It might give you a bit of an edge over the UV5R, with it's 4 watts.
I still have to measure the battery capacity. For a 8000mAh it seems a little light to me.
The case has "Digital Mobile Radio" engraved in it. - It's not DMR. It is a traditional analog FM radio. It is CPU controlled and has a LCD display, but that does not make it a "Digital Mobile Radio".
In Germany most repeaters have been modified to conform with the 12.5kHz channel spacing. Therefore the N-FM (2.5kHz) is the FM-deviation of choice for repeater operation, whereas for other applications like the SO50 satellite, 5kHz wide FM is still correct.

Monday, 15 April 2019

Baofeng UV-5R programming with Windows 10

How to program the Baofeng UV-5R from a Windows 10 PC

Driver Installation

I needed to make some changes to my Baofeng UV-5R memory settings. Doing that manually is very unpleasant, and I have a programming cable, of course.
It is this one, that is not even labelled, but works great. (Important to note: it does not have the FTDI chip)
The most important thing is to have the right driver installed. The adapter acts a serial interface adapter and needs a driver for that.

USB ID of the adapter
I googled the ID of the adapter. The nearest match was the CH340 from wch.com. The driver can be downloaded from here.
The programming adapter apparently has to be plugged in when running the setup (with Admin rights), otherwise the driver installation failed on my machine.

Successful driver installation
To confirm the successful installation, check your device-manager. There should now be a new serial port.  Com3, in my case.
New Com-Port (3)
Once the programming cable is recognized as a serial port, we can proceed with the programming software

Chirp installation

Chirp is a fantastic piece of software that allows to program a wide variety of radios. Chirp can be downloaded from here. The daily build usually is the best version to use.
Chose the UV-5R
The serial adapter connects to the Mic/Speaker socket

I usually download the current setup from the radio, modify it and upload it to the radio.

Programming hints

It is absolutely not essential, but I like to see my name and call sign when I turn on the radio:
Power-on message
For normal ham-radio operation, these advanced settings work great for me:


Simplex programming

For normal simplex work, I use the old fashioned, wide deviation FM settings. That might vary from region to region.
Simplex Channel example
There are some unused settings here for the tone squelch. The important bit is to have the Duplex field empty.

Repeater programming

For the local repeaters, tone mode settings depend on your local requirements. Here is a very simple example for a 2m repeater:
Repeater example
The 2m repeaters in my IARU region have negative 600kHz offset for their input. This repeater doesn't need any tones.

Prevent transmission

Sometimes you might want to just listen in and be 100% sure you don't interfere with a service you have no license for. In that case, set Duplex to "off".
Duplex off = no TX
If you press the PTT key, the radio won't transmit. An interesting feature for those not-yet holding a ham-radio license.


Wednesday, 20 February 2019

SSTV from the ISS - or - How Windows 1803 ruined my weekend

Dell Latitude e6400 audio problems - or so I thought

Ok, I had noticed that for a while my trusty old Dell Latitude e6400 had stuttered on audio playback. But as I hardly ever use that Laptop for video or music, I didn't really care.
Big mistake!

SSTV weekend on the ISS

I was very happy to read, that ARISS announced an SSTV event  for February 8th to 10th. After some initial tests from home on Saturday. I decided that a trip to the open fields with some tech stuff to capture images from space was a great father & son activity.
The Saturday tests went ok with the antenna indoors and my daughter's laptop:
Not great, but promising SSTV image
So far so good. So I packed my SDRPlay RSP2pro, a HB9CV antenna, some cables and my Dell Laptop.

In the field

The plan was to capture the ISS-pass from 12:50 to 13:00 CET with SDRuno and process the captured I/Q data later. This went quite well and thanks to the fact that we could see all of the satellite band, we heard interesting FM traffic on 145.960MHz from stations all over Europe.

On a handheld, we would have missed
this unexpected signal
When finally the ISS came into view, we saved the whole pass to a .wav I/Q file, at the same time trying to decode the SSTV on my mobile with BlackCat's SSTV app. This worked rather poorly, but as it was very windy, I didn't think much of it.
Despite of that, I knew that audio on the laptop was a bit choppy. But that should not affect the I/Q recordings that didn't pass the sound driver.

Discontinuity!

Ok, once we had that, we wanted to see what we got and replayed the I/Q file to MMSSTV through VB Virtual Audio Cable. (Differnt PC, than before.)
Ouch! That didn't work out.
Ok, I could even hear that, when listening to the recording, approx. every five seconds, the interval between the sync pulses was shorter than expected. This meant, that the Dell Laptop completely froze every 5 seconds, and it was quite possibly not just a sound problem.

Windows 10 Version 1803 broke my Laptop

After re-installing drivers one-by-one from the Dell Support Website, it is extremely likely the storage driver was the culprit: After I had reinstalled the Intel Rapid Storage driver from Dell's site, the problem went away.

I also read here, that disabling the eSATA port in the BIOS fixes the problem. (At the cost of losing the eSATA port.)

Unfortunately my collection of SSTV recordings is pretty much unusable, unless I resort to filling in some silence or noise manually. That Sunday was fun but did not yield any results. (Apart from fixing my laptop in the process.)


Saturday, 27 February 2016

Sommercamp Yaesu FT-290R back in operation

After about 15 years of little or no morse practice, my CW is dog slow and I can barely even follow a conversation at  moderate speeds.
Fortunately a friend nearby suffers from the same problem. He holds a German class "E" license which restricts him to a limited selection of ham bands, while I have an "A" license, permitting full access to all ham bands. So the wonderful Pixie I assembled a little while ago is not an option here.
We both have shortwave rigs, but neither of us has a proper antenna out there, nor does the bulky equipment have a very good WAF in our families.

So 2m sounded like a great option to get back into CW, with the added benefit of not exposing half the continent to our noobish morse code.

I do own a used, mid 80s (that's 1980s, for you young whippersnappers) Sommerkamp branded Yaesu FT-290R VHF multi-mode rig. I hadn't used that for over ten years.

The NiCad batteries (from around 2000), are still undergoing the "alive" procedure in my old Conrad Charge Manager 2000 which will take about a week for the 8 cells.

An other problem caused more pain: The foam padding in the battery compartment had turned into a black, gooey substance that was about to work it's way into the NiCad's plastic tubing.
I had to sctatch that off with a spudger and wipe everything clean.

Half liquified foam 
Same thing with the rear panel. Some of the foam already stuck to the wire insulation and the components of the PCB. I don't think I got all of it out, but did the best I could.

Foam residue everywhere
So if you have an old FT-290R, remove the foam ASAP, that'll save you a lot of trouble.
Apart from that, this thing is built like a tank and deserves a "they don't make 'em like that any more" rating.


Sunday, 27 September 2015

Building the QRP Pixie v3 ham radio transceiver

When I saw this kit on Banggood, I just couldn't resist. A 7 MHz / 40m ham radio transceiver for just under 4€ is certainly worth a try.
The kit came with very sparse instructions, partly in Chinese. It had a circuit diagram, a parts list and enlarged PCB silkscreen with it.
I arranged the components on my desk in the order of the BOM. This made sense as it starts with the passive components.
Bits'n pieces

I was a bit unsure about the inductor values, but found a nice calculator here.
The soldering was painless and took about an hour.
The assembled 40m Pixie
For the initial tests I soldered a 9v clip to the legs of the power socket. My power supply caused a bad 50Hz hum, so I had to go for battery power.
The Pixie prefers battery power
To check the output, I connected a 50 Ohms resistor (came with the kit) to the output and had a look at it with my scope.

Transmitter output
By the looks of it, I can't expect perfect spectral purity. But it is QRP, so I can let it get away with it. The signal will most likely pass an ATU anyway.

My friend CP had printed me this case from thingiverse. A perfect fit:

The enclosure designed by egil
Next thing was listening in: With a random length of wire (abt. 3m) I could hear some stations from all over Europe very faintly but good'nuff to follow the CW QSOs. I heard all of them at the same time. There is no narrow band filter. So be prepared to use your ears/brain to do the signal processing.
There is also no volume control and the "RIT" is not accessible with this enclosure. (This THING addresses the RIT issue).
The Pixie circuit is as basic as it can get, while the nice key/phone/power/antenna sockets feel like luxury to me.

73 de dl9set

PS: You must be a licensed radio ham of the appropriate license class to operate this transceiver.