Saturday, 26 March 2016

UDP-Ranger - a simple ESP8266 range tester

The problem

I tried to find reliable information on the range of the ESP-12 series modules, but was not quite happy with what I found. Neither the use of highly directional antennas (or is it "antennae"?) nor the selection of client devices seemed right to draw conclusions about the actual range.

EDIT: see the 1st part of my video about the tester here.
EDIT: and here is the 2nd part if the video with the results

The idea

ESP-8266 modules at both ends of the connection seemed like a good idea to me. Normally you would use a simple ping-test to see if packets are lost on the way between the modules.

ICMP

Despite the fact that the LWIP stack in NodeMCU does handle ICMP properly, I have yet to see a "Ping" program to send/revceive ICMP echo-requests/replies.

TCP

TCP connections between two NodeMCU endpoints are super easy. But the TCP  protocol will do it's best to compensate the loss of packets, so we wouldn't detect missing packets until the connection breaks up completely.

UDP

UDP does not provide such a recovery mechanism for lost packets, so the application has to handle that. We can use that easily to find out when packets go missing.

The solution

Ok, so UDP it is. We'll simply connect an ESP-12e module in station-mode to an ESP-12f module in soft-ap mode and send UDP packets from the ESP-12e to the ESP-12f module.
The payload of each packet is a numer that is incremented by one for each packet. So if a packet is missing, it is easy to detect.
The ESP-modules

What you need


The server.lua script

 local LED_PIN1 = 4  
 gpio.mode(LED_PIN1, gpio.OUTPUT)  
 local sw1 = true  
 wifi.setmode(wifi.SOFTAP)  
 cfg={}  
    cfg.ssid="AReResearch"  
    wifi.ap.config(cfg)  
 function init_OLED(sda,scl)  
    sla = 0x3c  
    i2c.setup(0, sda, scl, i2c.SLOW)  
    disp = u8g.ssd1306_128x64_i2c(sla)  
    disp:setFont(u8g.font_6x10)  
    disp:setFontRefHeightExtendedText()  
    disp:setDefaultForegroundColor()  
    disp:setFontPosTop()  
 end  
 init_OLED(5,6)  
 err=0  
 cold=1  
 disp:firstPage()  
   repeat  
    disp:drawStr(0, 10, "AReResearch UDP-Ranger")  
    disp:drawStr(5, 35, "Waiting for client...")  
   until disp:nextPage() == false  
 s=net.createServer(net.UDP)   
 s:on("receive",function(s,c)  
   print("Sequence="..c.." Previous:"..cold)  
 if ((cold+1)~=tonumber(c)) then  
   err=err+1  
   end  
 disp:firstPage()  
   repeat  
    disp:drawStr(0, 10, "AReResearch UDP-Ranger")  
    disp:drawStr(5, 35, "Packet Nr:" .. c)  
    disp:drawStr(5, 45, "Errors:" .. err)  
     until disp:nextPage() == false  
     if (sw1) then  
       gpio.write(LED_PIN1, gpio.LOW)  
     else  
       gpio.write(LED_PIN1, gpio.HIGH)  
     end  
   sw1 = not sw1  
 cold=c  
 end)   
 s:listen(8888)  

The client-lua script
 wifi.setmode(wifi.STATION)  
 wifi.sta.config("AReResearch","")  
 wifi.sta.connect()  
 LED_PIN1 = 4  
 gpio.mode(LED_PIN1, gpio.OUTPUT)  
 print (wifi.sta.getip())  
 x=1  
 tmr.alarm(2, 1000, 1, function()  
   conn = net.createConnection(net.UDP, 0)  
   conn:connect(8888,"192.168.4.1")  
   conn:send(x)  
   conn:close()  
   conn = nil  
   x=x+1  
   print (x)  
   if x>1000 then x=1 end  
   p=tonumber(wifi.sta.status())  
   print (p)  
   if p == 5  
     then  
     gpio.write(LED_PIN1, gpio.LOW)  
     print ("LED OFF")  
     else  
     gpio.write(LED_PIN1, gpio.HIGH)  
     print ("LED ON")  
     end  
 end)  

Ok, the programming is admittedly a bit sloppy. The counter will simply roll over at 1000 packets and will thus increment the "lost packets" counter by one. It is good enough for me at the moment.

Start the "server"module first

The "client" has sent packets

How to use this

Once the client module has connected to the "server", the server module's  LED will be toggled every time a packet is received. More info in how many packets have been missed is shown on the OLED.
So it is easy to tell when the connection starts breaking up.

The results

My first test run gave me a pretty stable connection up to 300 meters. Beyond 400m I couldn't get anything at all.

Sunday, 13 March 2016

Espressif ESP-12e module radiation pattern

The ESP-12e module has an onboard PCB antenna. When an IoT device is located near the edge of my WIFI network, pointing the antenna the right way may add a few meters to the useable range.
Having had a little time over the weekend, I decided to build a contraption that allows me to rotate the module and record both signal strength and orientation.
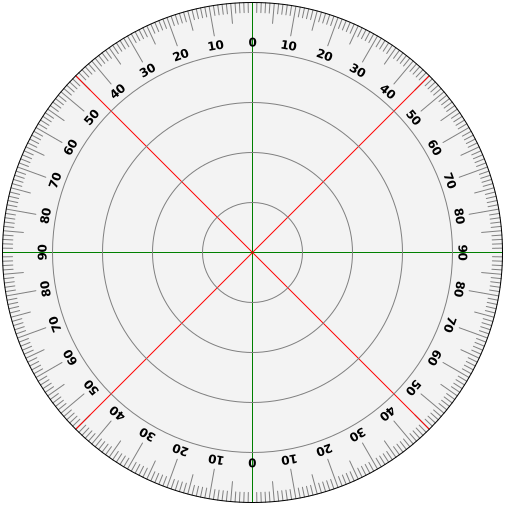
There ist a nice protractor.svg file on wikipedia. I use Inkscape to scale and print that.

You may also want to watch my video on this topic here.

Some woodworking

And the protractor
Pointer and tripod adapter
Next I need to put the ESP-12e module in AP-Mode, so it sends beacon packets. Then I wire it in a very basic configuration to run from a 3,7V lithium cell. To drop 0.6V, I put a 1N4148 in series with the module. (Actually, a 1N4148 a bit weak for the job. Go for a 1N4001 if you can. I couldn't find one in my parts bin.)
The TXD/RXD wires are still connected for programming
Can it get any simpler than that? GND and GPIO15 are connected to the negative terminal, VCC and CH_PD to the cathode of the 1N diode. The anode is connected to the positive terminal.
I use a 18650 cell and this holder.
No more unnecessary stuff
Test run
Now mount it all on a tripod and wait for a sunny day to take it all outside where we have little or no reflections.


Ok, let's go outside...


Results

I used LibreOffice to turn the handwritten values into a polar diagram. Here is the resulting  chart:


Although I didn't expect the field to be completely uniform, the result is pretty obvious:
The module (looked at from the component side, antenna pointing away from us) has a clear west-north-westernly preference and a clearly visible minimum at the opposite end. So you'll want that (upper left) corner of the module to point at your access point if you get near the edge of your wifi range.

ToDo

While working on this project, I found out about the ESP-12F, which supposedly has an improved antenna design over the ESP-12E. I do not have one here at the moment, but will compare the two if I can get hold of one.
To get a smoother chart, I should do two full rounds to smooth out the errors and do finer steps (5 instead of 10 degrees).


PS:

If you want to try the same, you don't need a Wifi tester. A PC with InSSIDer (the free 1.3.2.1 version), or even use another ESP-Module as WiFi scanner as shown here.

PPS: Shopping list:

Thin plywood, the size if an A4 paper
The protractor.svg file from wikipedia
A 18650 rechargeable battery. (Well, and a charger if you don't have one)
Suitable 18560 battery holder
One 1N4001 diode
and of course the ESP-12e module

Saturday, 27 February 2016

Sommercamp Yaesu FT-290R back in operation

After about 15 years of little or no morse practice, my CW is dog slow and I can barely even follow a conversation at  moderate speeds.
Fortunately a friend nearby suffers from the same problem. He holds a German class "E" license which restricts him to a limited selection of ham bands, while I have an "A" license, permitting full access to all ham bands. So the wonderful Pixie I assembled a little while ago is not an option here.
We both have shortwave rigs, but neither of us has a proper antenna out there, nor does the bulky equipment have a very good WAF in our families.

So 2m sounded like a great option to get back into CW, with the added benefit of not exposing half the continent to our noobish morse code.

I do own a used, mid 80s (that's 1980s, for you young whippersnappers) Sommerkamp branded Yaesu FT-290R VHF multi-mode rig. I hadn't used that for over ten years.

The NiCad batteries (from around 2000), are still undergoing the "alive" procedure in my old Conrad Charge Manager 2000 which will take about a week for the 8 cells.

An other problem caused more pain: The foam padding in the battery compartment had turned into a black, gooey substance that was about to work it's way into the NiCad's plastic tubing.
I had to sctatch that off with a spudger and wipe everything clean.

Half liquified foam 
Same thing with the rear panel. Some of the foam already stuck to the wire insulation and the components of the PCB. I don't think I got all of it out, but did the best I could.

Foam residue everywhere
So if you have an old FT-290R, remove the foam ASAP, that'll save you a lot of trouble.
Apart from that, this thing is built like a tank and deserves a "they don't make 'em like that any more" rating.


Sunday, 21 February 2016

CX-10 - Extending the flight range

Extending the Cheerson / Sanlianhuan CX-10 C flight range

Disclaimer:
This mod is not my original idea. I've found it here and here. Unfortunately I could not find any information about the additional range gained by the antenna mod. We can fix that.

Also see my video about the same topic here.

The antenna mod

The antenna mod cound hardly be simpler. The transmitter comes apart easily:


  •  remove the screws at the bottom and the handles. Also pry out the on/off switch
  • The transmitter can then be carefully be pulled apart. Take care of the battery cables


  • The antenna wire can easily be located on the transceiver module

  • Drill a small hole through the top cover just above the tranceiver module and stick the antenna wire through it.

  • Put it all back together. Done


What's the range gain?

Now for the part I was most interested in:
I did my range tests in the woods where I was sure not to have any 2,4GHz interference from WiFi or other LPD appliances. The results are pretty clear.

Setup Range (m) Range (ft)
Original 10C controller (orange)26m 85ft
Modified 10C controller (orange) 35m 115ft
Original 10A controller (black) 25m 82ft
Modified 10A controller (black) 36m 118ft
All distances are measured on a horizontal path. The drone's flight level was about 2 meters. The range indicates the distance between the remote control and the spot where the CX-10 crashed because it lost the connection.
Still extracted from video.

The attainable height has also increased to the point that I find it hard to see the craft in the air. But I haven't found a reliable way to measure heights.

Bottom line

Yes, it is totally worth it. The mod is easy and safe for beginners and the nearly extra 10 Meters make quite a difference. I had lost control of the drone a couple of times and had to climb my garage roof to recover it, This hasn't happened since.


PS: Banggood has the CX-10C on sale for under 20€ now.

Tuesday, 16 February 2016

Painless Surface Pro 3 Windows 10 migration

Today I upgraded my Microsoft Surface Pro 3 from Windows 8.1 pro to Windows 10 pro.
I was a bit worried about odd stuff like old Java versions I need for compatibility reasons and numerous development and network tools. Moreover, my work machine is a domain member and sits behind a HTTP-Proxy.
It turned out to be the most painless upgrade ever:

  1. Download the GetWin10 tool from Microsoft and run it.
  2. After a while it asked me if I wanted to keep my apps and data. Yes, of course!
  3. All of that took less than an hour and then some to recognize my external monitor.
  4. Another round of Windows and "Store" updates
  5. Run "iexplore.exe" from the command line and keep it in the task bar
  6. Remove Edge from the task bar. (Sorry, Edge just doesn't feel right for me, yet)
Upgrading Windows has never been easier
That's it. If I find any problems, I'll list them down below.

PS: If you're behind a proxy, you have to let the "metro-world" know about that. In an Admin-CMD shell, type:
 netsh.exe winhttp import proxy source=ie
Otherwise windows activation will fail.


List of problems encountered:

  • Some signed macros in office documents won't run. Cause still unknown.

Thursday, 4 February 2016

DSO 138 firmware updates

DSO138 firmware update

A little while ago, I built the DSO 138 and blogged about it.
I was a bit disappointed at first to that JYE Tech wouldn't publish any new firmware releases, because the scope appears to have quite a bit untapped potential. Specifically the USB-Port.

So I was pleased to stumble over an announcment that they made the latest version available to the public. No USB support yet, but some great improvements like better zeroing.

The update process is pretty simple and you'll find an instructional video here.

Bill of materials

You need:


The process


  • Close the jumpers 1 and 2 on the back of the PCB

  • Connect the USB-Serial Adapter
  • Get the flash upload utility ready
    The serial port number depends on your PC configuration.
    Check in the device-manager which com-port appeared when you plugged
    in the USB-Serial adapter
  • Power up the scope
    The screen will light up
  • Be brave
  • Select the .hex file
  • Wait
  • Disconnect power and the USB adapter and re-open Jumper 1 and 2. This works great with solder wick, but you can also use the dry tip of the iron to remove the solder.
  • Power up
    New splash screen.
    Although both grammar and spelling suggest otherwise, the firmware is  pretty solid.

Tuesday, 19 January 2016

Cheerson CX-10 - Flying below freezing

Finally winter is here!

Complete with snow and everything. So last weekend we tooks the skis and the sled and, of course the CX-10 C drone. (See here for a review in my blog or the video.)
A good opportunity to shoot some spectacular footage of the kids racing down the hills.
Or that's what I thought.
I thought I had the CX-10 C charged up at home and put it in my jacket's outer pocket. So I was amazed that it started flashing a battery warning at me the moment it took off.
After only seconds of flight, it was unable to gain altitude and dropped to the ground.
So I took it back home and the CX-10 C was well again, down in the comfortable 20C of the secret underground lab.
I had expected a somewhat reduced flight time, but nothing that drastic. So to double check I took it out for another test flight later yesterday evening.
Really cold now.
Too little flight time for good shots

EDIT 20160119: Bangggod has the CX-10 C on sale this week for under 20€

The construction of the battery compartment might be good for higher temperatures, but it obviously is a bad idea below freezing. The fans will also add to the cold airflow.
The battery is exposed to the elements.
So my first attempt to improve winter performance is to put some 10mm Kapton tape over the grids to keep the battery warm. All flights have been made with the microSD card inserted, but no recording active.


Setup Batt.tmp Env.tmp Flight-time
No insulation +20C -3C 1:40min
No insulation -3C -3C 0:25min
Kapton tape +20C -3C 2:15min(1)
Kapton tape -4C -4C 0:20min(2)
Indoor flight +20C +20C 2:40min(3)

(1)=Battery warning flashing after 2min. Could not hold altitude after 2:10min. The charge meter showed 60mAh in the subsequent recharge.
(2)=Battery warning flashing after after a few seconds. Could not gain altitude at all. The charge meter showed 12mAh in the subsequent recharge.
(3)=Recharge cap 81mAh after flight

This tape does not add much weight

I conclude from these tests that it makes sense to keep the battery warm (who would have guessed) and to ensure it stays that way as long as possible. I was hoping that a cold, insulated cell would heat up due to the higher internal resistance. But that effect seems to be neglegible here.